Installation
The installation information is as below, this information has been provided in order to ensure the best experience in setting up the zander ecosystem for your Network.
Requirements
- MySQL Database
- NodeJS (minimum version: 18.18.2)
Database
- Open the
dbinit.sqlfile - Change the database name if you'd like it to display as a different name.
- Connect to your MySQL server and run the script to load the database onto your database server.
Web/API
- Clone the Web repo.
- Install all of the required packages using
npm i - In the root folder, open the
.env,config.json,filter.json,joinMessages.json,features.jsonandlang.jsonand fill out as per the instructions in Configuration. - Run
npm prodto start the application/website/api.
Discord
- Visit Discord Developer Portal, and click New Application button, and type your application name, and then Create.
- On the left menu, click Bot, and click Add Bot button.
- Click Reset Token, and click Copy button.
Referenced from https://discordgsm.com/guide/how-to-get-a-discord-bot-token
-
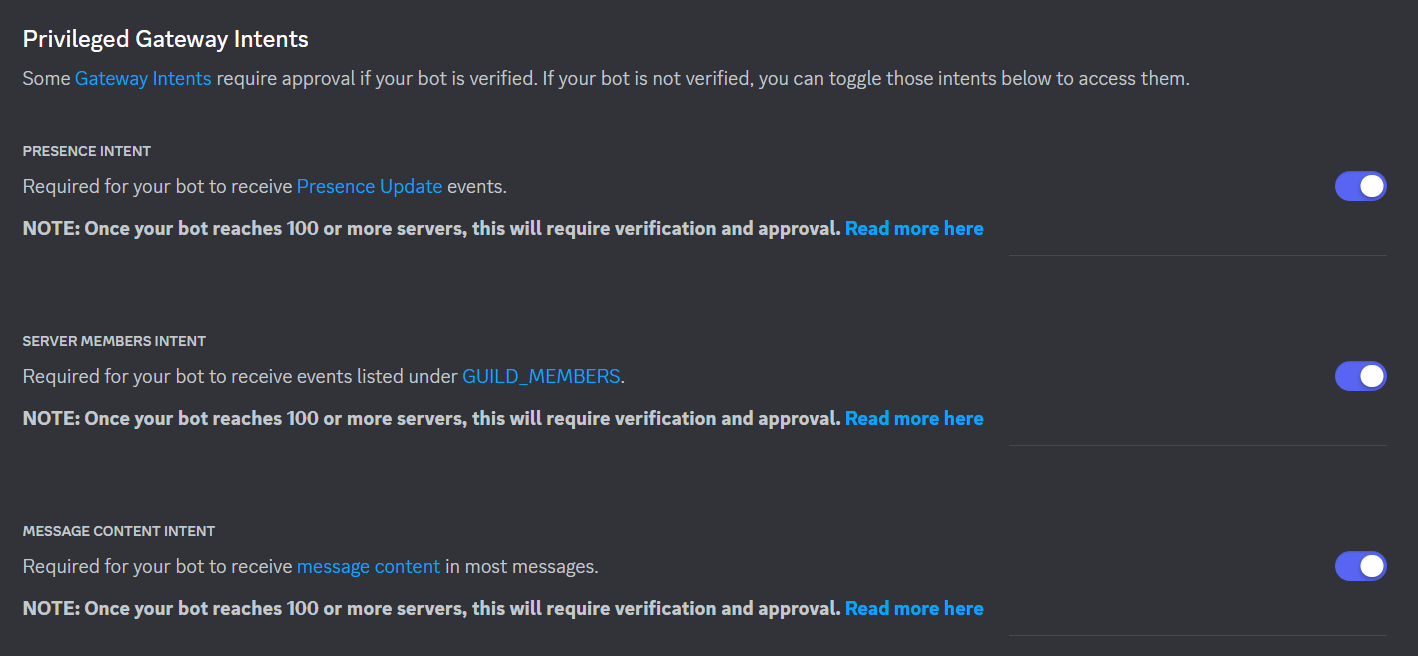
On the Bot tab, under Privileged Gateway, turn on all options.

-
Open the Discord channel you want to receive the messages/notifications.
-
From the channel menu, select Edit channel.
-
Select Integrations.
-
If there are no existing webhooks, select Create Webhook. Otherwise, select View Webhooks then New Webhook.
-
Enter the name of the bot to post the message.
-
Optional: Edit the avatar. -
Copy the URL from the WEBHOOK URL field.
-
Select Save.
-
Enter the Webhook URL into the
discord.webhookfield.
Proxy
- Clone the zander plugin repo.
- Compile the zander plugin suite.
- Put the zander-proxy plugin in your
pluginsfolder on your Proxy. - Launch the Proxy once, then close the Proxy.
- In the
pluginsfolder, open theconfig.ymland fill out as per the instructions in Configuration - Launch the Proxy again to finish.
Hub
- Put the zander-hub plugin in your
pluginsfolder on your server. - Launch the server once, then close the server.
- In the
pluginsfolder, open theconfig.ymlandwelcome.ymland fill out as per the instructions in Configuration - Launch the server again to finish.